Sourdough Hamburger Buns
Sourdough hamburger buns are easy to make, and a simple way to upgrade your burger game! Start your dough in the morning, and have the fresh and ready for dinner!

I’ll start by saying that I love sourdough, and I love that it’s become so popular.
But I believe that sourdough should be easy. I’ve seen so many tutorials on how to get the perfect ear on your loaf, why you should use a thick starter versus a thinner starter or vice versa, and so much more. Honestly, it’s not for me. I admire the science. I find it fascinating, and I take notes. But at the end of the day, I’m a busy mom. I want delicious and nutritious food, and I can’t have it consumed in my day.
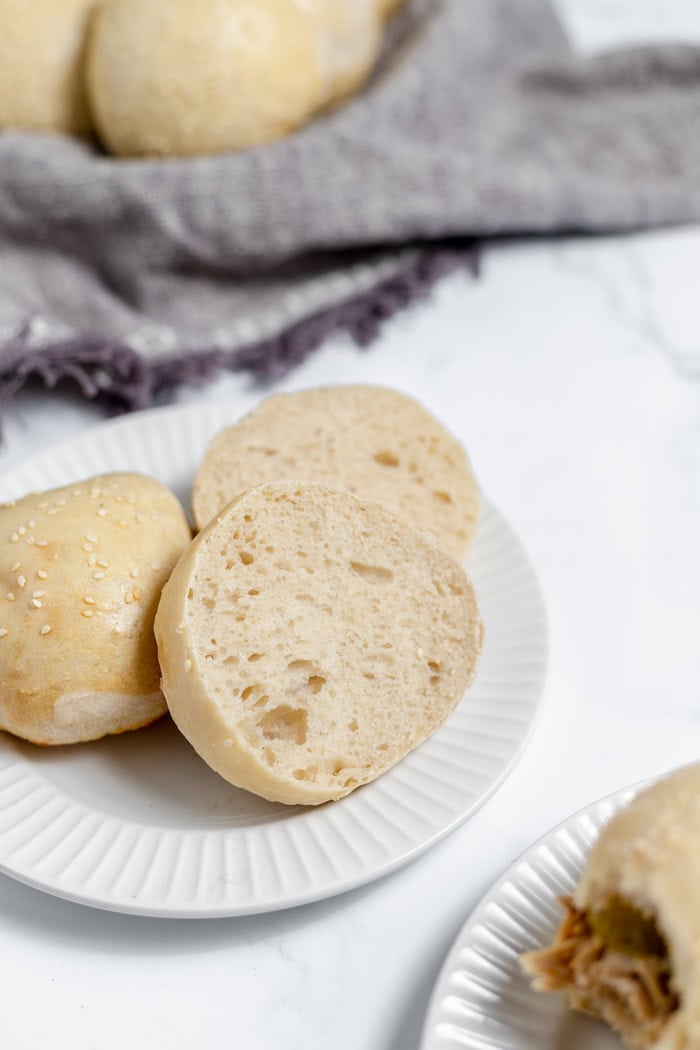
So no, my sourdough sandwich bread isn’t done with exacting timing, scoring, or worrying about over or under-proofing. But it is soft and fluffy.
It’s the same with these sourdough hamburger buns.
Ideally, you’ll have a food scale that measures in grams to take away the guesswork of getting your dough just right, but other than that – and even that can be worked around – this is a very no-fuss recipe.
Ingredients for making sourdough hamburger bun Recipe
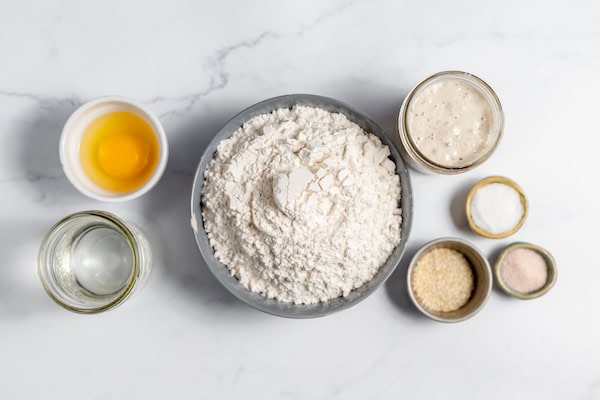
- Fed sourdough starter (instructions for feeding can be found here, or in the recipe card below)
- All-purpose flour
- Water
- Sugar
- Salt
- Egg (for an egg wash)
- Sesame seeds (optional)
All of these ingredients are very basic baking supplies that you likely already have on hand. This is why making your own bread products is so great!
You’ll notice that I’m using all-purpose flour rather than whole grain. Using part whole wheat flour is fine, however. I would suggest limiting it to about a cup to preserve the rise and texture.
Doing an egg wash and sesame seeds is also technically optional for those with food allergies. If you skip the egg wash, you may want to consider putting a pan of hot water in your oven while you bake the buns to provide some steam and a nicer finish.
How to Make Sourdough Burger Buns
This is a simple process, but like all sourdough recipes, it is lengthy. Don’t make a mistake about lengthy or complicated, though! The majority of the time is spent proofing. Your sourdough starter needs time to grow and ferment.
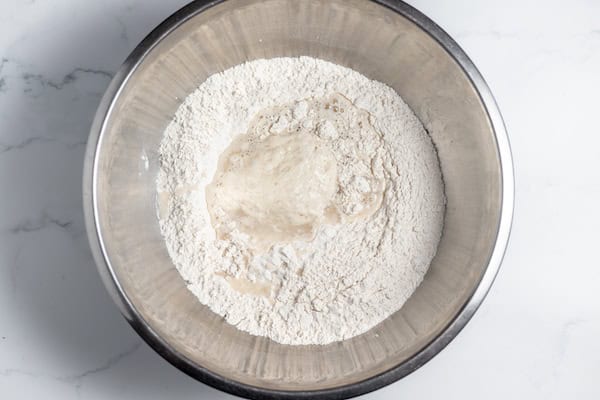
Step 1: Whisk 100 grams of active starter with one cup of warm water, 4 1/2 cups of flour, 2 Tablespoons of granulated sugar, and two teaspoons of salt in a large mixing bowl. Stir until a dough forms. You can do this in a stand mixer with a dough hook, but it’s pretty easy to mix by hand. The dough will be a little shaggy, and You may think it’s too loose to be able to shape nice buns from this dough, but just wait – it’ll completely change over the next few hours!
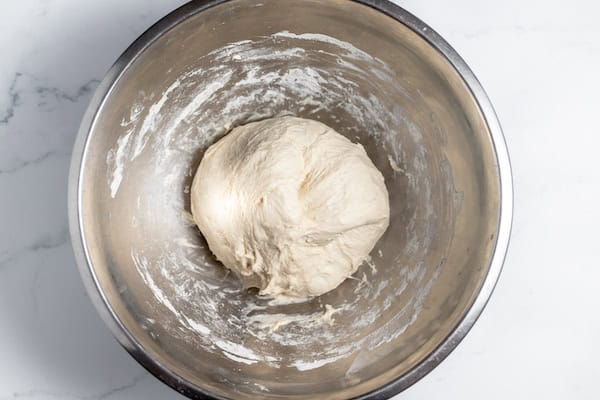
Step 2: Cover the dough bowl with a towel, such as a flour sack towel. Set a timer for 30 minutes, and let it sit at room temperature. When the timer goes off, perform 4 stretches and folds. This simply means to wet your hands, grab one side of the dough, stretch it upward, and fold it toward the center. Turn the bowl a quarter turn, and repeat. Set the timer for another 30 minutes
Repeat for a total of three stretch and fold sessions. This strengthens the gluten and makes the dough strong enough to hold its shape when you make your buns.
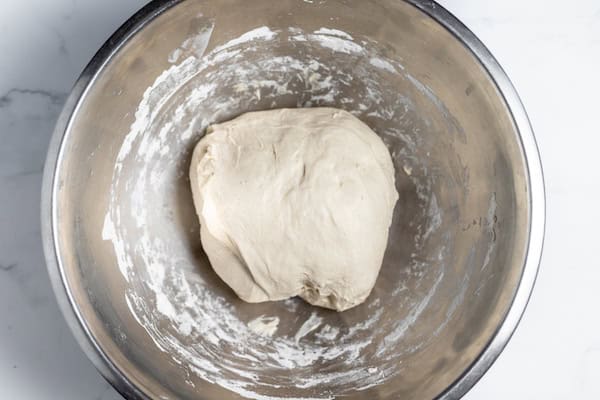
Step 3: Cover the bowl of dough, and let bulk ferment until it has risen to about doubled – in a warm kitchen, this may take as little as three hours, or up to six hours in a cooler kitchen. You can also slow the rising process by refrigerating it up to 24 hours.
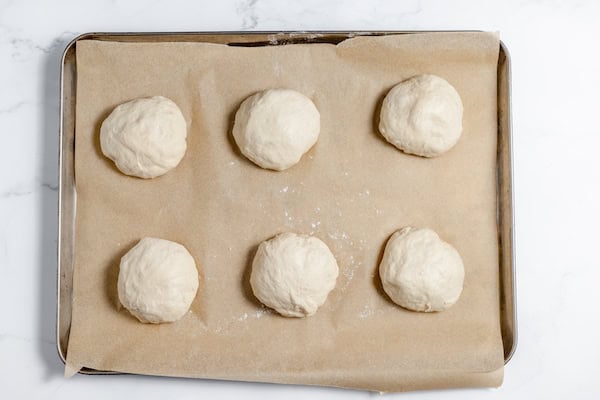
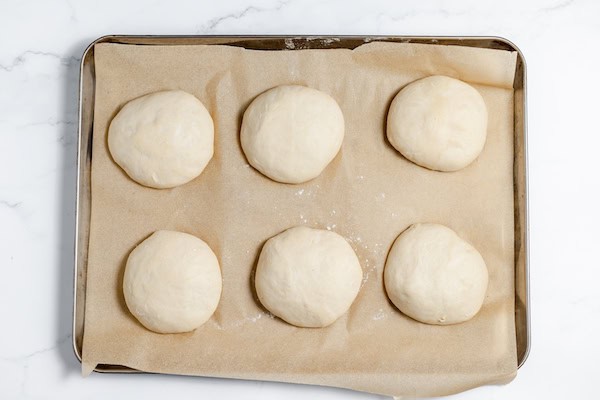
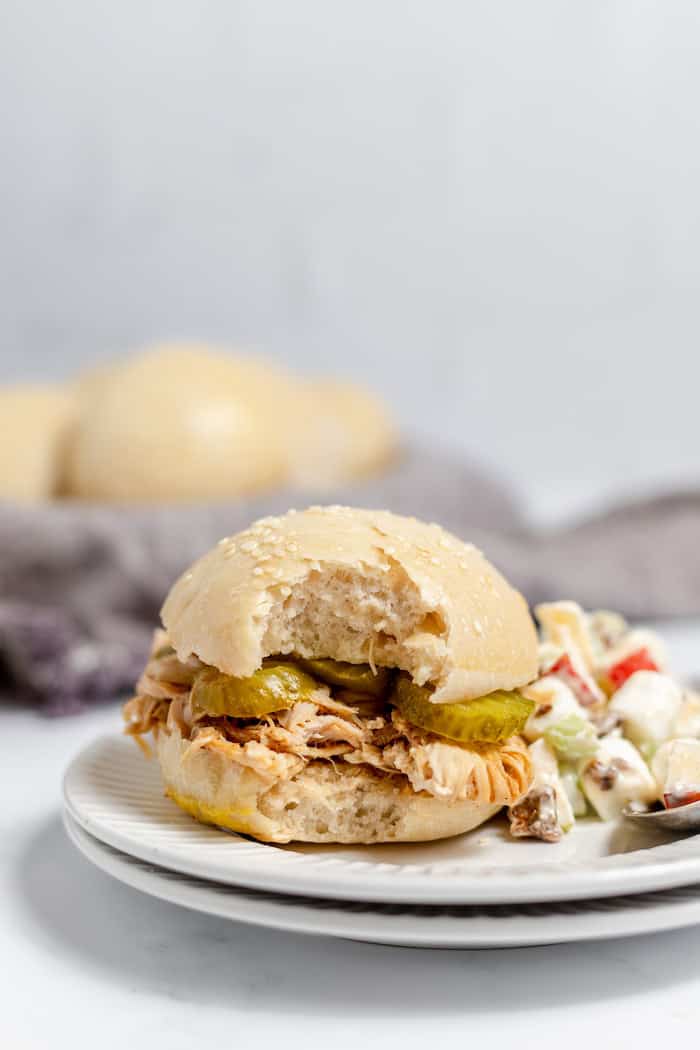
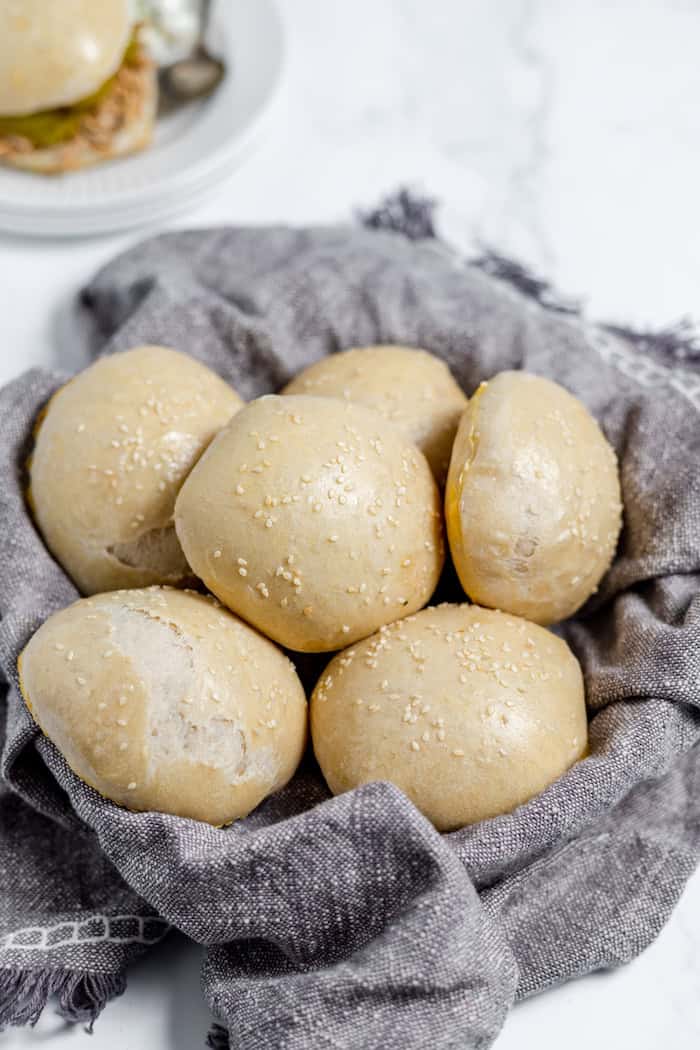
Step 4: Turn dough onto a lightly floured surface and separate into 12 equal-sized balls. Place a ball seam side down on a parchment paper lined baking sheet pan, and press into a disc about the width of a hamburger (These buns will rise but shouldn’t spread out wider). Repeat, placing each dough ball/disc a few inches apart on parchment-lined baking sheets. Cover with a flour sack towel, and let rise 1-2 hours, until at least somewhat puffy (there should be some oven spring during baking to make them rise higher).
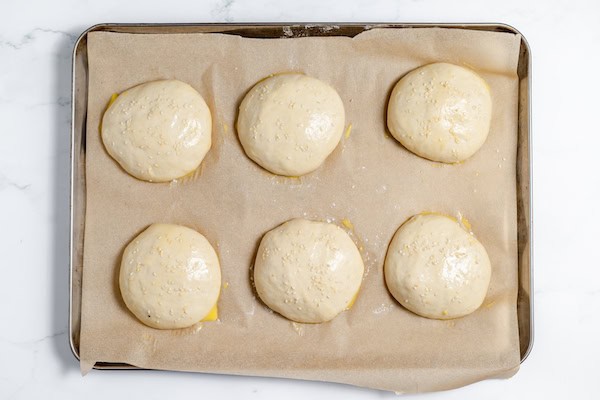
Step 5: Preheat oven to 350º. Whisk egg with 1 Tablespoon of water, and lightly brush the top of each bun, then sprinkle with sesame seeds.
Step 6: Bake in preheated oven for 25 minutes until a light golden brown
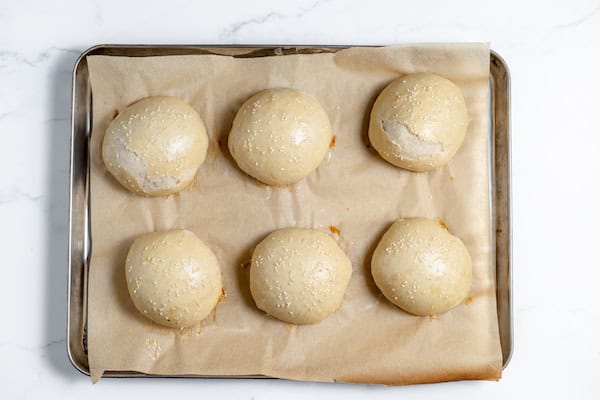
Step 7: Remove buns from the oven and let cool before slicing
How to store homemade sourdough hamburger buns
If you’re not planning to serve your buns right away, here’s how to store them:
Let cool completely.
Seal into an airtight bag such as a ziplock or one of these bread bags.
Store at room temperature for 3-5 days
For longer storage, buns can also be frozen in an airtight bag for a few weeks. To thaw, move the refrigerator overnight. This slower thawing will help prevent condensation on your bag, but you can thaw them on the countertop if desired inside the bag so that your buns don’t get soggy.
I recommend not slicing the buns until ready to use to keep them fresh.
As with most sourdough bread, I’m not a fan of storing it in the refrigerator. While it does keep it from going moldy longer, it also tends to change the texture and dry it out.
Frequently Asked Questions
Can I use this recipe to make hot dog buns? Yes, absolutely! Instead of shaping the dough into a ball, roll it into a log. They flatten it somewhat. The oven spring will give it a nice dome.
Can I top the buns with something other than sesame seeds? You can skip topping them entirely if you want. Or you can use something like everything bagel seasoning or poppy seeds instead. Another option is to skip all the toppings including egg wash, and brush the tops with butter after they’re baked.
How many days can the dough be refrigerated before baking? You can extend the bulk ferment stage for 2-3 days in the refrigerator, or you can shape them into buns, cover them with plastic wrap, and refrigerate them for up to 24 hours. I would make sure they come back down to room temperature before baking in that case.
More Sourdough Recipes:
- Homemade Sourdough Tortillas
- Sourdough Caramel Apple Cinnamon Rolls
- How to Dehydrate Sourdough Starter
- Sourdough Sandwich Bread Recipe
- How to Feed Sourdough Starter
Sourdough Hamburger Buns

Tasty sourdough hamburger buns for a different take on your sandwiches.
- Prep Time: 10-12 hours
- Cook Time: 25 minutes
- Total Time: 10-12 hours
- Yield: 10–12 rolls 1x
Ingredients
To feed sourdough starter:
- 33 grams of sourdough starter
- 33 grams all purpose flour
- 33 grams of warm water
For the hamburger buns:
- 4 1/2 cups all purpose flour
- 2 Tablespoons granulated sugar
- 2 teaspoons salt
- 1 cup warm water
- Fed starter
- 1 egg
- 1 Tablespoon water
- Sesame seeds (optional)
Instructions
To feed the starter:
- Combine starter with water and flour in a jar or bowl
- Let sit at room temperature covered with a loose lid or cloth until starter is bubbly and doubled in volume (2-4 hours). This is called “active starter”
To make the buns:
- Stir flour, sugar, and salt together
- Add water and active starter, and stir until a dough forms
- Stir or use hands to knead dough until flour is all incorporated
- Cover, and let rest for 30 minutes
- Uncover, and using floured hands, grab one side of the dough and stretch, folding over toward the center
- Turn bowl 1/4 of a turn, and repeat until you’ve stretched all four sides of the dough
- Cover, and repeat process twice more for a total of three “stretch and folds”
- After the third stretch and fold, cover dough, and let rise or bulk ferment until dough has doubled in size – 4-6 hours. At this point, you may also cover it with plastic wrap and refrigerate to halt fermentation for 1-2 days
- After dough has risen, separate into 12 equal sized balls
- Place balls on parchment lined baking sheets a few inches apart, and flatten down to about the diameter of a hamburger bun
- Cover with a towel and let rise until doubled – 2-3 hours
- Preheat oven to 350º
- Whisk egg with 1 Tablespoon of water, and brush tops of buns
- Sprinkle with sesame seeds
- Bake in center of oven for 25 minutes, until lightly browned
- Remove from oven and let cool completely
- Use a bread knife to slice open, and serve


These breads are really delicious and nutritious.
Sourdough Hamburger Buns very good! Your writing is a work of verbal art, thank you for giving us that experience. We hope you will share more with us!
Enjoyable sourdough hamburger buns! Thank you for allowing us to feel the beauty of your words through your writing. Your continued cooperation is greatly appreciated.
That sounds amazing! I’ve been trying to get into baking more lately. Store-bought buns just don’t compare to fresh ones.