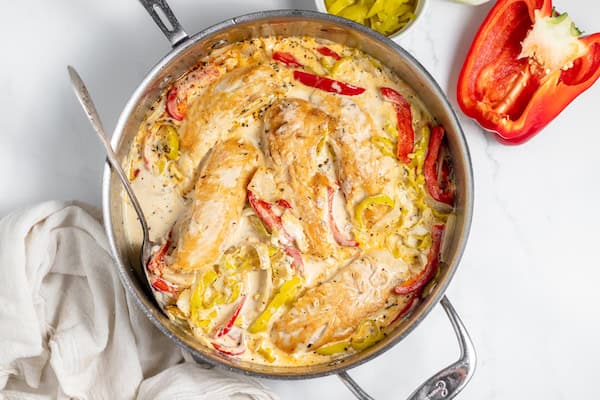
How to Can Pears
Do you want to learn how to can pears? This tutorial will show you every step and option you have!

Last week, the kids and I canned pear, and I gotta tell ya, it was one of the most satisfying things I’ve done in a while.
I remember one year when the kids were little, our orchard went gangbusters, and I was so stressed out trying to can and freeze everything. But this year was different.
Those rugrats jumped in and started coring and quartering pears without even being asked while I peeled and dunked them in lemon water.
It made the process go so fast! Many hands really do make light work.
That said, canning anything can be a long, tedious process if you have a lot of it, regardless of how many helpers you have.
So when it comes to canning, patience is key. I like to listen to an audiobook or my favorite podcast. I even moved the TV into the kitchen once this summer so I could watch the World Championship marathon while I can. ????
What are the best types of pears for canning?
I’m a big believer in using what’s available. Is it always ideal? No. I remember one-time canning at least fifty quarts of black cherries. Would it have been nice to have sour cherries for pie filling, etc.? Yes, but that’s not what we had, so we canned what we had and found ways to make them tasty and use them.

What I’m saying is, don’t get down if the variety of pear you have isn’t at the top of the list. I’ve made some amazing spiced pear sauce out of pears that wouldn’t be considered “good” canning pears.
That said, according to Penn State University, Bartlett, Bosc, Anjou, and Comice are considered the best pears for canning and freezing.
How to can pears
Prepping pears to can is very similar to prepping apples to can apple pie filling.
Whereas with canning diced tomatoes or peaches, you would quickly scald the fruit to loosen the peeling, with pears (and apples), you peel using a knife.
Peeling pears is both easier and harder than peeling apples – easier because they’re soft and your knife slips right through, and harder because they’re not as uniform, and it’s almost impossible to use a crank peeler on pears.

My process is simply this:
- Quarter pears
- Core pears
- Peel pears
- Place peeled and cored slices in a bowl of lemon water until ready to can.
The lemon water helps keep them from turning brown while you peel enough to make a canner full.
In the spirit of complete honesty, this can get a little messy. Pears are soft and juicy, so you know it’s going to get sticky!

My best advice for minimizing the mess is to stand at the kitchen counter, or for shorter people (like kids), at the kitchen table, standing on a stool if necessary. If you have a lot of pears to prep, you may be tempted to rest your feet and sit at the table to do your peeling. I’m not saying you should never do that, but it won’t take long to have juice running down your arms and dripping off your elbows.
Standing up keeps the juice down on your cutting board.
Clean off your cutting board often. You can see in the picture above how little bits of pear break off and get mushy all over. This happens less if your pears are just ripe and more firm, but it still happens. I find myself rinsing my board off now and then to keep it under control.
How to keep pears from turning brown
I alluded to this already, but a large bowl of lemon water is a great way to keep your waiting pears from turning brown and getting soft.

You can also use citric acid or stay fresh, but I find I always have lemon juice on hand, so that’s the easiest way for me.
Use about 1/4 cup of lemon juice to a quart of cool water, and just let the prepped pears gather there while you peel and slice.
To slice or to halve?
You can slice or not slice your pears however you like. I prefer to quarter them because that makes them easy to core. But canning halved, whole, or even diced pears isn’t wrong.
It’s all about personal preference.
After you’ve cut and peeled your pears, you’re going to pack them into clean jars, but first, you need syrup.
How to make a light syrup for canning pears
Confession time: I’m not a huge fanning of adding sugar. I don’t want my pantry shelves filling up with jars full of sugar.
But when you can fruit, you need something.
Can you can pears in water? Technically, yes. But it results in a mushy and fairly flavorless fruit (this goes for peaches, too, by the way). Don’t forget that during the canning process, the natural sweetness of the fruit is leached into the water around it.
But does that mean you have to use sugar? Yes and no.
You can make light syrup by dissolving half a cup of sugar into a quart of water.
You can also use fruit juice, which is a more natural sugar. White grape and pineapple are two popular choices, as well as pear juice itself. This is a pretty common practice in commercial canneries, actually. If you look at the grocery store shelves of canned goods, you find a lot of options, including “heavy syrup”, “light syrup”, and “fruit juice”. If you use fruit juice, you may want to cut it with water to lighten the flavor.
Another option for making syrup is to use maple syrup. In this, you might use 3/4 cup of syrup per quart of water. This is personally not my favorite because while I love the flavor of maple syrup, I don’t love it watered down. And especially now that we live in an area where maple syrup is about worth its weight in gold, it’s not a great option for us.
I usually choose to use cane sugar, and here’s how it’s done:
Add 1 1/2 cups of sugar per 5 quarts of water in a large pot and heat until dissolved.

Easy peasy!
How to Jar Your Fruit
Before you start, everything needs to be clean. Don’t give germs a foothold in your jars. you’ve done too much work to waste that food!
Some ways to sanitize your jars are:
- Boil them. Since we’re water bath canning, you’re going to have a giant kettle of hot water going anyway, so this is easy
- Run them through the dishwasher
- Heat them in the oven. 350º for 15 minutes should do it.
Your rings should also be clean, and your lids should be brand new, if you think you can get a second use out of a lid, make sure it’s also clean.

Use a slotted spoon to lift your pear slices out of the lemon water and into the jars. Using a canning funnel will help keep the rim of your jar clean as you do this.
Gently pack them down, and fit as many in as you can. You don’t want to mush them, but you want more pear, and less syrup in your jar.
Pack them to about half an inch from the top of your jar. The Ball canning book says to layer your pear slices in the jar, turning them so that the pit side faces inward and can’t be seen. I don’t know about you, but I don’t have time for that. I also don’t see commercial canneries bothering with that. So do what you will with that information.

Use a ladle to then pour the warm or cool (but not scalding hot) syrup over the pears, covering the top pear but still staying about 1/2 an inch below the rim.

Wipe down the jar rim with a clean cloth to remove any pear residue or stickiness. You don’t want anything obstructing your seal!
Then fit with lids and twist rings on firmly.
Lower the filled jars into a warm water bath canner fitted with a rack to keep your jars from directly touching the bottom of the kettle.

Fill the kettle with additional water if needed to make sure it covers your jars by at least an inch.
Bring the kettle to a rolling boil, and process quarts for 25 minutes or pints for 20 minutes.
Remove from heat, and let cool with the lid on for an hour or so before removing jars carefully.
Canning pears is a process, but oh, it’s worth it! We love having pears from our orchard on hand to make pear crisp in the winter. One of my favorite pear recipes, though, is cinnamon pear jam. It’s so good on sourdough toast in the morning!
PrintHow to Can Pears

Have you ever canned your own pears? It’s so simple and you’ll keep your pears fresh year round.
- Prep Time: 30
- Cook Time: 25
- Total Time: 55
- Yield: Varies
- Category: Canning
- Method: Stovetop
Ingredients
- 8–10 lbs Pears
- 1/4 cup Lemon juice
- 1 1/2 cups Sugar
- water
Equipment:
Instructions
- Prepare a large bowl or container to keep sliced pears in so they don’t turn brown as you peel by combining 1/4 cup lemon juice per quart of water
- Prepare simple syrup: In a large kettle, add the sugar to 5 quarts of water. Heat until sugar dissolves, then remove from heat. Note: Syrup can be swapped for pineapple or white grape juice.
- Now you’re ready to peel, core and slice pears
- Submerge pears in lemon water as you go to keep them from turning brown until you have enough to fill a canner
- Lift pears from lemon water with a slotted spoon and fill jars, packing firmly, but gently so you don’t smash fruit
- Fill jars to between 1/2 and 3/4 of an inch from the top
- Fill jars with simple syrup to cover pears
- Fit with lids and rings, screwing rings on firmly
- Place in a Water bath canning kettle, fitted with a canning rack, and half filled with warm water
- Add water if necessary so that jars are submerged in water by about an inch
- Bring kettle to a rolling boil, and process pints for 20 minutes, and quarts for 25 minutes
- Remove from heat, and let cool
- If you need to remove jars from canner before they’re cool, wait as long as you can, then carefully lift jars using a jar lifter. Cover jars with a towel as you lift them to protect from drafts, and move to a place such as a counter top where it won’t be deserved, and cover with towels until the jars have cooled.
- Let jars rest for 24 hours. At this point, rings can be removed from sealed jars for storage
- If you have unsealed jars, you can store them in the fridge for up to 7 days, or remove lids, wipe down rims, inspecting for chips or a reason why your jar might not have sealed, fit with new lids, and process again
- That’s it!


To prevent the pears from browning, soak them in lemon water as you go until you have enough to fill a canner.
After reading this article, I realized it’s not as hard to can pears as I thought. I’ll give it a shot.
Oh! Your method is very good, I can use lemon to make pears not discolored for a long time. Store in a box to avoid exposure to air. pears will keep for a very long time. Your blog is so good I hope I can read more of your posts next time.
This is an excellent essay. It appeals to me much. Thank you very much!
Wow Good idea
I didn’t have any expectations concerning that title, but the more I was astonished. The author did a great job. I spent a few minutes reading and checking the facts. Everything is very clear and understandable. I like posts that fill in your knowledge gaps. This one is of the sort.
Thanks for sharing. Join jacksmith for the most fun experience the game has to offer.
Thanks for sharing. Join jacksmith for the most fun experience the game has to offer.
I am thoroughly impressed by the quality of your work. This post is a true masterpiece, and I am grateful to have come across it.
Thank you for sharing this valuable knowledge. I’ve been struggling to come up with many questions on this subject. I’ll stand by your side!
Eating well, living fell, & reading your post everyday and makes me feel well. You are a true inspiration.
Thanks for sharing this amazing post.
Your inclusive language and tone create a safe space for all forum users.
Thank you for being patient with newcomers and providing guidance when needed.
Your ability to distill complex ideas into simple explanations is a gift.
Good post
You are amazing. I should thank you for all the work you put into making this post
This excellently crafted blog gracefully delves into its subject matter, providing astute observations and actionable guidance that captivates and informs its audience throughout.
Your recipe is very good; however, the advertising on your page is over the top. There were even ads included when I printed the recipe, which blocked the instructions.
The forums you share are really helpful to me, I will follow your posts regularly. For more information about me, go here:
Discover the easiest way to can pears! Say goodbye to store-bought & enjoy delicious, homemade pears year-round with these simple steps!
Thanks for sharing the amazing post.
Your recipe is too good and delicious also.
This piece provides a fresh and compelling take on the subject.
This post is full of useful tips. Thank you for putting this together!
good story and logic, i like it. thanks for sharing
wow! What a meaningful activity, I appreciate the work you guys are doing!
It makes me feel better that you were kind enough to tell me this. That post you wrote on your site is one that I really enjoy reading a lot. You gave people something interesting and useful in this blog post.
Great pear canning tutorial! The tip about involving kids is gold – many hands make light work, as you said. Keeping busy during long processes is key; audiobooks and podcasts are perfect.
This post answered several questions I had been wondering about. Thank you for breaking it all down so simply.
I’ll be returning to this great blog more regularly. I appreciate how intelligent your post is.
This sounds like a lovely tutorial! Your story about the kids spontaneously helping with the pears when your orchard was overflowing is just heartwarming. It really shows how family involvement can make even big tasks feel lighter and more satisfying. Great read!
This sounds like a lovely tutorial!
It really shows how family involvement can make even big tasks feel lighter and more satisfying. Great read!
Futbollibre es una plataforma completa de fútbol online. Accede a transmisiones gratuitas y partidos destacados.
Nice and practical guide on canning pears very easy to follow for beginners and perfect for long-term storage.
Are you in need of authentic medications on the Internet? Check out medmeds and get real medications, competitive pricing, and speedy delivery. Enjoy a hassle-free and safe medical shopping experience without ever having to leave your house.