How To Set Up Your Blog
So, you’ve decided to start blogging, you’ve even decided on a domain name and tagline, and all the stuff we talked about last week. You’ve been looking at WordPress themes, but you’re still a little intimidated by all the tech-y stuff involved in setting up a professional blog.
Me. Too.

I have spent hours learning how to work HTML, CSS, plugins, and… stuff. I realize now that I could have been money ahead to hire someone to do it while I stuck to doing things I’m good at, but I’m glad that now I know at least some backend stuff and can hire with more confidence when I need to.
So, with that said, most of us need to do it on the cheap when we start a blog, which means that we’ll be doing as much as we can ourselves – and as cheaply as possible.
Bluehost, which I mentioned in last week’s post, How To Start A Professional Blog, is a great resource for that reason. Not only are they a solid hosting company (and by the way, a “host” is where your blog will live – the data you enter – your blog posts – has to stay somewhere!), they’re incredibly affordable, and I think the majority of bloggers start there – if not stay there for life!
Bluehost Pros: Easy to work with, dependable, cheap, and fabulous customer service. I started a new blog on Bluehost last year (because, you know, one just isn’t enough, apparently :P), and I have been 100% and have experienced downtime only once for a very short time.
Bluehost Cons: When your blog grows and starts seeing a lot of traffic, you’ll probably need to switch to faster, more personalized hosting. I have a friend with a large blog on Bluehost, and she’s very happy with it. Still, while my newer, smaller blog is on Bluehost, Frugalfarmwife.com lives on Flywheel hosting (which I highly, highly recommend to anyone with a large blog looking for dedicated VPS hosting) because when a lot of people are looking at your blog at one time, you need speed!
The good news is switching hosts takes a little bit of time, but it’s not hard, and if you decide to make a switch when your blog gets bigger, a new hosting company will probably be more than happy to do the work for you.
How To Set Up Your Blog
If you haven’t already bought your domain name, do so now.
These days, sadly, the odds are good that your preferred name has already been taken, so brainstorm a bunch of possibilities, then head to Bluehost.com.
Click the “Shared Hosting” button in the drop-down menu.
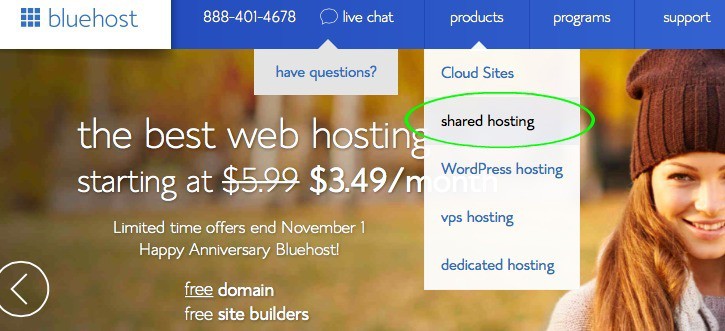
Then scroll down to here and select your plan:
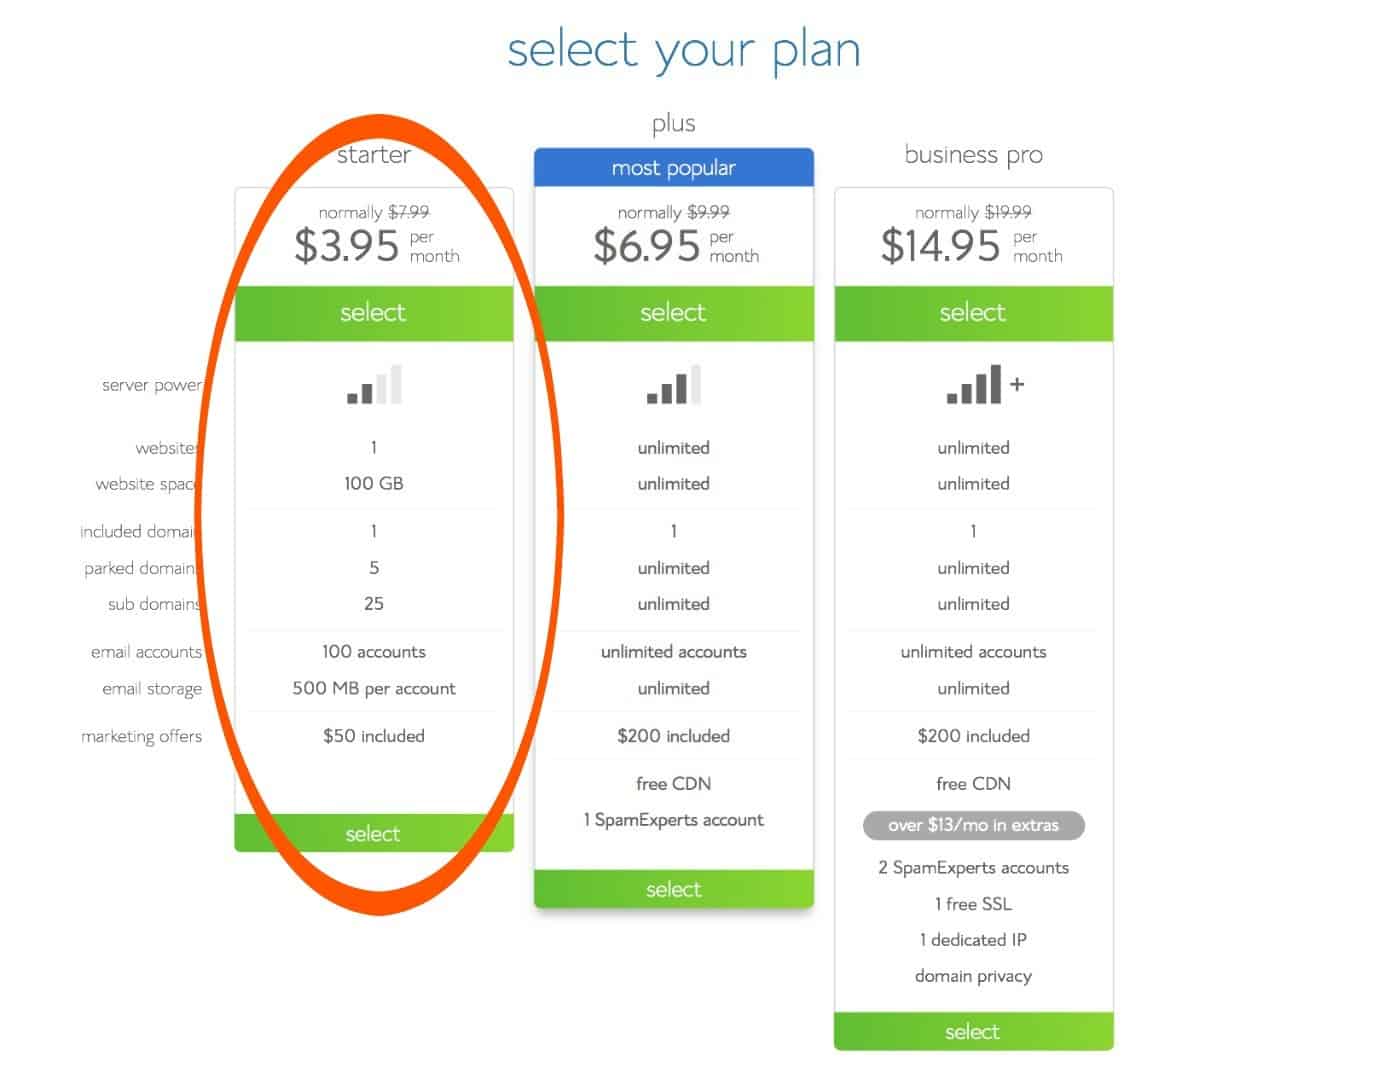
I recommend going with the starter plan, which I’ve circled in red. You do have to pay a lump sum, but it saves you a LOT of money.
Once you hit “select”, you’ll see this screen.
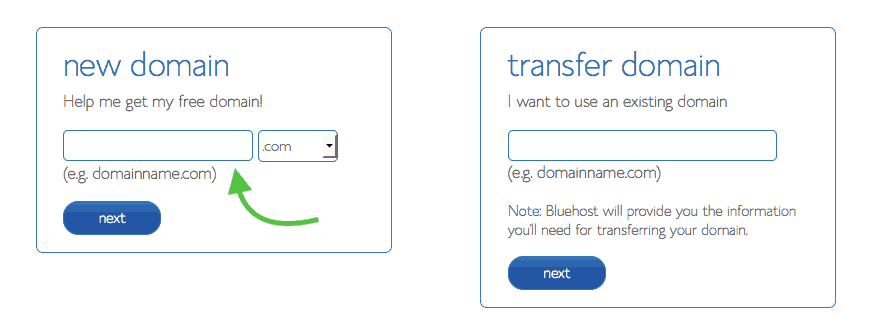
Enter your preferred domain name, and see if it’s available (hopefully it is!). If it’s not, go on to your next choice, and so on and so forth, until you hit on one.
Keep in mind that you DO want a dot com, as opposed to a dot org, or net, or pretty much anything else. Everybody types in .com automatically. The others take a bit of work to remember.
The next step will be to complete your registration with Bluehost. Once you do that, you’ll move on to step two: Installing WordPress.
How To Install WordPress
WordPress is a blogging software. It is easily the most versatile for the average person, and since it’s the most widely use, it has the most widely available plugin options and expert help. I used to blog on Expression Engine, and let me tell you, finding tech help for that is a challenge – most people had never even heard of it! (fortunately, I didn’t have to find people because my brother is one of those rare experts. :))
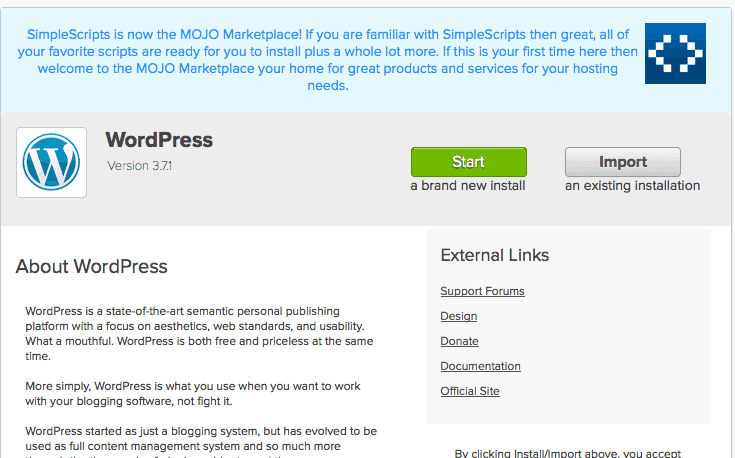
So what you’ll do is login to Bluehost, find the Website Builders section, and click on the WordPress logo. (you can see it circled in orange at the bottom of the picture below)
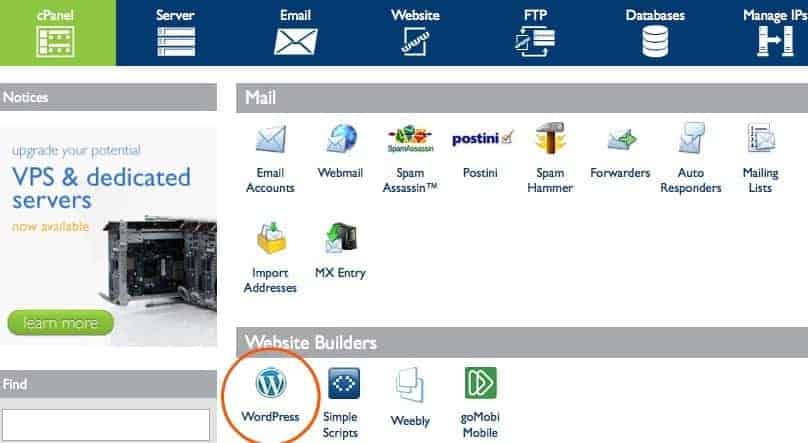
On the next page, click “install” in the “do it yourself (Free)” section.
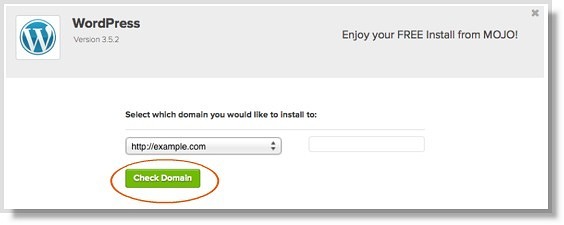
Then check your domain:
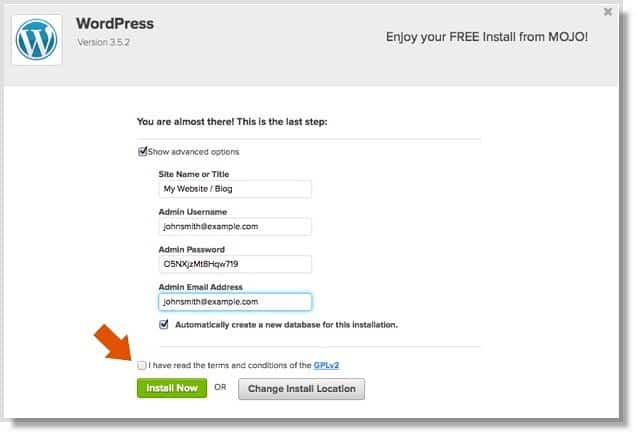
Next, check the terms and conditions box and click “Install now”.
Once you get the message that your installation is complete, the first thing to do is click “view credentials” in order to get your login information – admin URL, username, and password. You can always change them later, but for now, write them down. You’ll need them for your first login!

Type your the URL into your web browse, and enter your login credentials into the box, which should look like the one below:
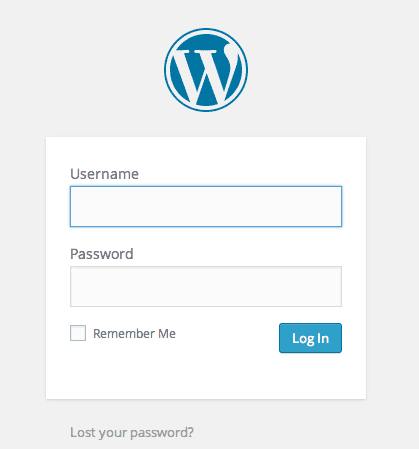
Boom! Done!
What now?
Now You can get to the fun stuff. You get to choose a theme and make your blog pretty.
I highly, highly recommend going with a premium framework like Genesis. In fact, I can’t recommend Genesis highly enough!
After you get the Genesis framework, you’ll want to get a pretty child theme. You may find one on Studio Press, the maker’s of Genesis that you like, and just buy the two together. I personally bought mine from Pretty Darn Cute Designs, and love it! (though I do plan to get a custom theme made sometime in the near future), and there are a number of other options. Restored 316 and Etsy are both good places to look.
Once you have your themes installed, you’ll probably want to also install some plugins. For instance, a recipe card plugin if you’re a recipe site (CookBook is what I’m currently using. Don’t use Easy Recipes, regardless of it’s popularity, it’s become outdated and isn’t working correctly with the latest versions of WordPress), plugins to display your social media icons and so forth.
One plugin that you absolutely NEED to install ASAP is Akismet, which will filter out spam comments. You won’t believe how many spammers will find your site within just a few days of going live. It’s crazy!
Any questions? Feel free to leave a comment or shoot me an email! Y’all know I’m not tech-y, but I’ll do my best to answer!
This article contains affiliate links. See my disclosure policy here.


Hi Elise, I can’t tell you how much I enjoy your blog! I wanted to ask, how long did it take to build traffic to your site and do you have any advise onhow to do it? Also, at what point did you seek affiliations?
Hi Sharon, With consistent posting, and sharing to blogger link parties , my traffic grew to 15,000 visits per month within a few months, but when I figured out how to make nice pictures and share them on Pinterest, my traffic exploded like crazy almost overnight. 🙂
What is a mute lot? How to play dumb lotto easy to win, high profit