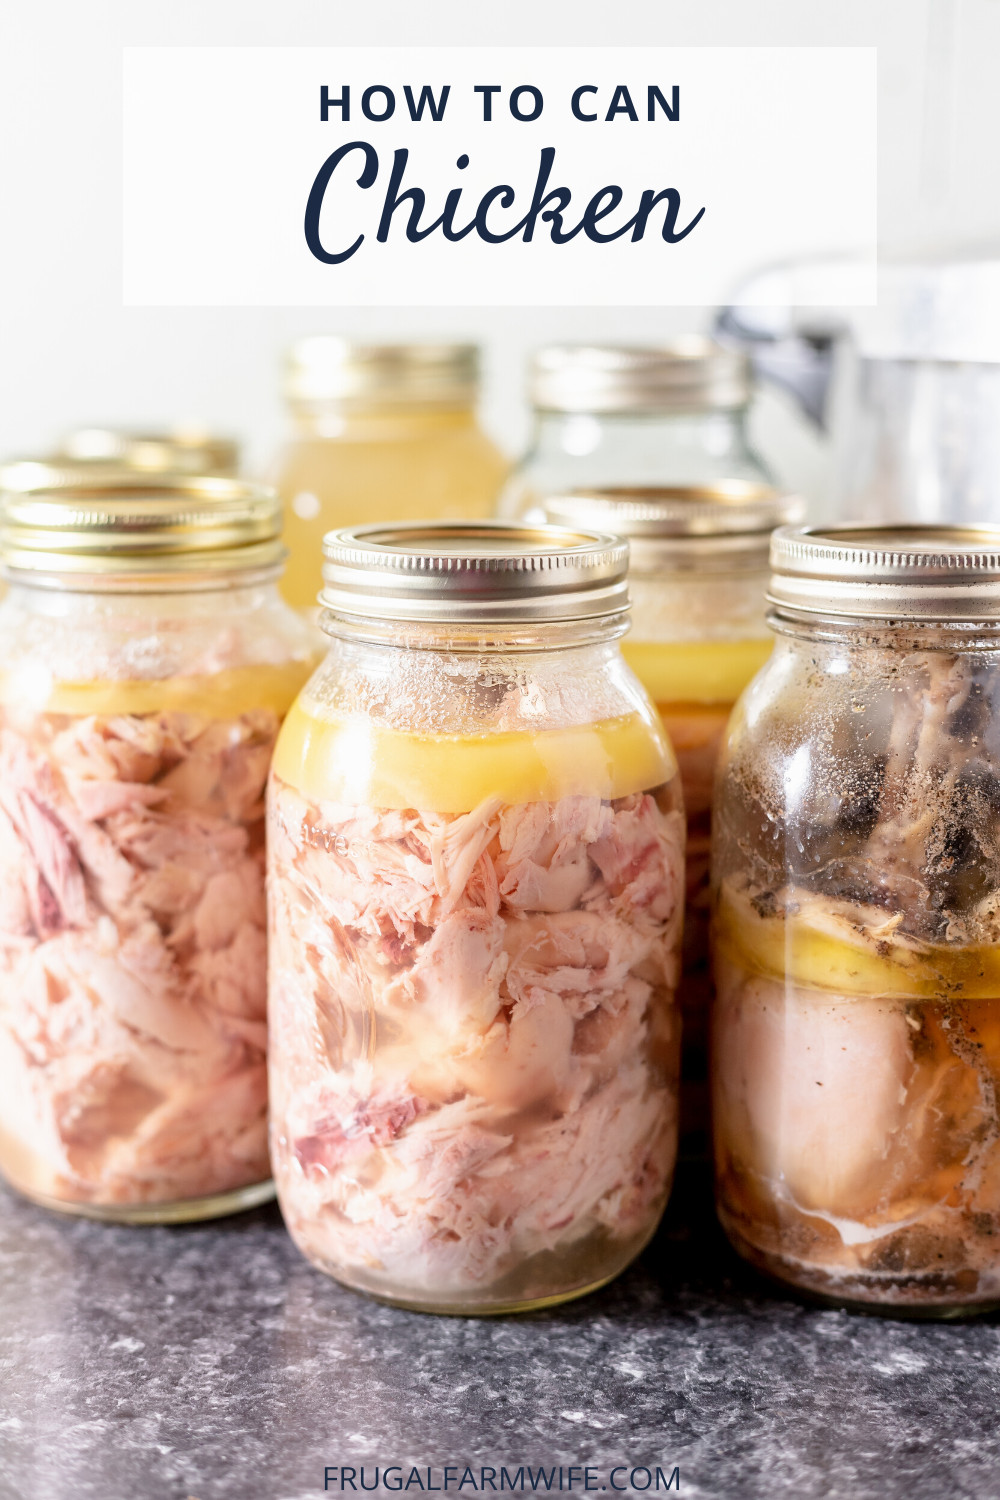
How to Can Chicken
Knowing how to can chicken is an essential homestead skill. Sure, your deep freezer is handy, but having preserved food that doesn’t rely on the electricity going off? Peace of mind like no other.
If you’ve been reading this blog for a while, you probably know by now that I grew up in an Amish community. While I have definitely chosen not to continue that lifestyle, I’m not gonna lie; I do miss it sometimes!
Side note: I know you’ve come here to read about canning chicken, not my life experiences. However, I’m giving this information in the context of my experiences, and hope it will inspire you to do stray just a bit from the book and do what works for you.
One of the things we used to do as a group was process chickens. Sure, there was the occasional one-off by yourself. However, in the fall, you might have a flock of hens that need to go before winter. Or maybe in the spring, you’d raise a flock of broilers for the express purpose of canning.
And when you have a day where 50 chickens need to be processed, well, many hands make light work. So we might do one neighbor’s flock one week and another neighbor’s the next.
That’s one of the really nice things about living in a community with similar lifestyles; instead of doing everything by yourself all the time, you can help each other out. I’m sure we spent the same amount of time processing chickens that we would have if we were working alone. Since we were working together, though, chatting and having a good time, it really didn’t feel like work at all.
This kind of upbringing might explain why I’m not a grab-coffee-and-chat kind of girl. I didn’t even know that was a thing people did until well into adulthood. Spending so many years getting together with friends to accomplish something while we visit really spoiled me.
What You Need to Know About Canning Chicken
My mom always used to have us separate the legs and thighs and pack those in jars, bone-in, skin-on, with salt and pepper. Ostensibly we’d be able to take them out of jars and crisp the skin up under the broiler and serve as a main dish.
Then we’d filet the breasts and can them separately. We used these a lot in casseroles.
Lastly, we made meaty broth by boiling the carcasses and deboning the meat that was left on them. That was great for soups and gravy, and I do love chicken gravy and mashed potatoes! We also canned vegetable soup (and still do), but for the most part, with chicken, we canned it alone and made soup later.
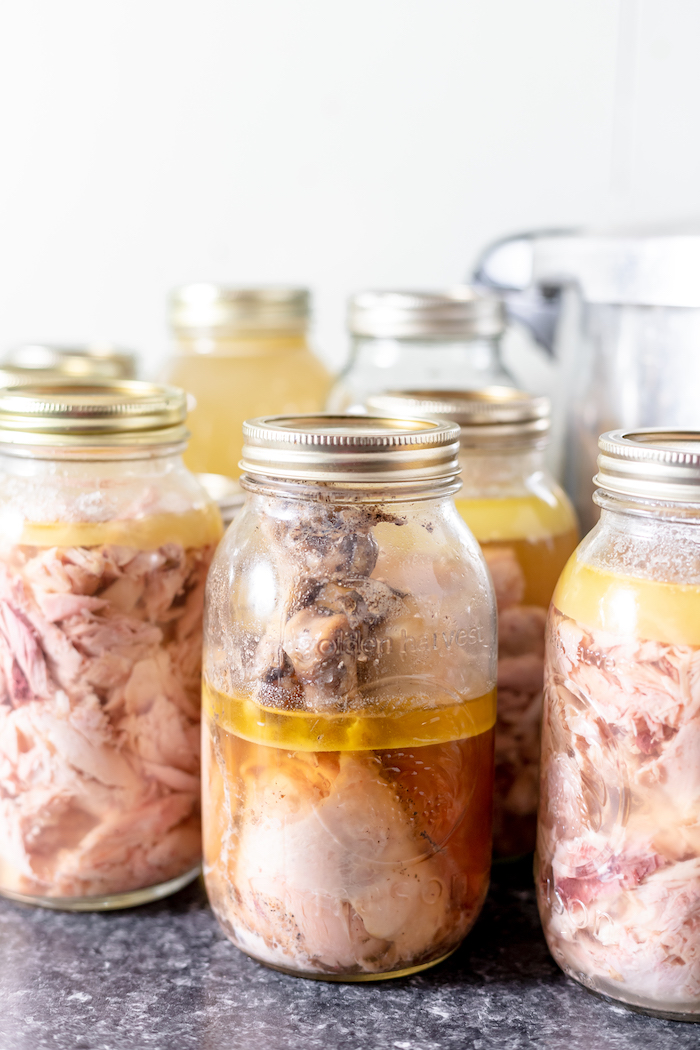
I canned a few jars of chicken legs the way my mom used to so I could show you here. But when I can chicken today, I mostly cook and debone it first and plan to use it in soups and casseroles. Everything else goes in the freezer.
I also make chicken broth out of the bones, but usually can it separately. While I do enjoy making slow cooker chicken broth, it’s nice to make a huge kettle on the stove, can it, and have it ready to use whenever I want.
I still do like to separate my dark meat and light meat, though.
And I should make a note here: you don’t have to raise chickens to can chicken.
I had hoped to raise a flock of broilers this past spring, but we had so much else going on that it didn’t happen. It turned out to be a good thing, though, because the weather turned very hot early in the season, and it wouldn’t have been the best spring for raising heavy meat birds.
All the meat I’ve canned this year has been bought. With meat prices so high, I do my best to buy the deals I find and can the extras for later.
A few weeks ago, I found 30 pounds of chicken leg quarters on sale for 50% off.
Out of that 30 pounds, I canned 12 quarts of chicken and 21 quarts of chicken broth.
For some reason, maybe I was stuck up. Maybe I just didn’t know any better. I used to think it was wrong to buy food to can – you had to grow it. But that’s silly. You do what you gotta do to get your family fed.
How to Can Chicken
To can chicken – or any other meat – you need a pressure canner. While you will definitely find people – particularly among the Amish – who water bath can meat, it’s honestly a terrible idea. I still do a lot of things the Amish way – for instance, I have canned Amish pumpkin butter instead of freezing it. But for the most part, it’s a good idea to follow safe principles such as those outlined in the Ball Home Canning Book.
The pressure allows much higher temperatures than simply boiling water, which kills any bad bacteria in your jars of chicken and keeps them from spoiling.
Besides that, water bath canning takes forever.
If you’ve never used a pressure canner before, check out my article on how to use a pressure canner.
Besides your canner, you need canning jars, lids, and rings.
Wide-mouth canning jars are popular, especially among newbie canners. It makes sense because, let’s face it, food comes out a lot easier. But while I personally love wide-mouth jars for things like feeding my sourdough starter or making broccoli sprouts, I don’t love them for canning. In my experience, the seal on that larger lid is just not as strong. Plus, replacement lids are more expensive.
I prefer to use small mouth jars whenever I can and typically only use wide mouth when I have large bone-in pieces.
You can use either pints or quarts. For our small family, it makes more sense to can chicken in pint jars since they hold a bit more than a pound of pre-cooked chicken (for raw chicken, the weight comes in at right about a pound, which is perfect for us).
That said, I usually use quart jars and plan to make 2 to 3 chicken meals whenever I open a jar.
This, again, is largely due to availability (it’s easier and cheaper to collect quart jars than pints), and because you are able to can a lot more in less time when you use quarts.
All that to say, use the jar size and type that you prefer. Everyone has their own needs and preferences!
How to Raw Pack Chicken for Canning
As I mentioned earlier, I typically cook my chicken before I can it nowadays – that’s usually referred to as hot packing.
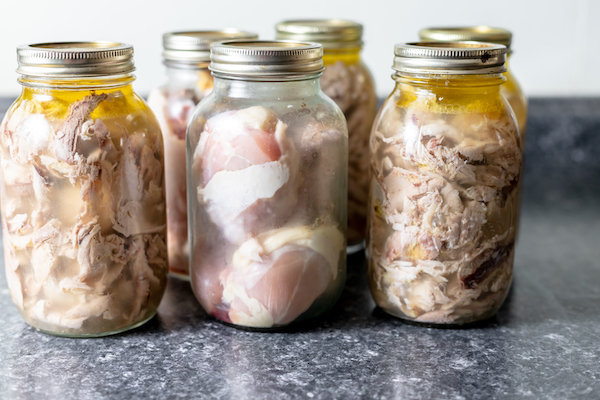
But raw packing is a quick and easy way to do it if you have a lot of chickens to put up – especially if you have whole chickens.
- You can raw pack bone-in or boneless
- Skin-on or skinless
So you can see how that might save you some time.
The downside is that you’re dedicating some of your shelf space to inedible chicken parts when you can bones and skin.
Pack raw chicken into room temperature jars, and top with a teaspoon (if using quarts) of salt and pepper (optional); ladle broth or water over the chicken to fill the jars to within an inch of the lid.
Fit with lids, and process in your pressure canner. Bone in: pints for 60 minutes, quarts for 75. Boneless: pints for 75 minutes and quarts for 90 minutes.
How to Hot Pack Chicken for Canning
This is the method where you cook your chicken before you can it.
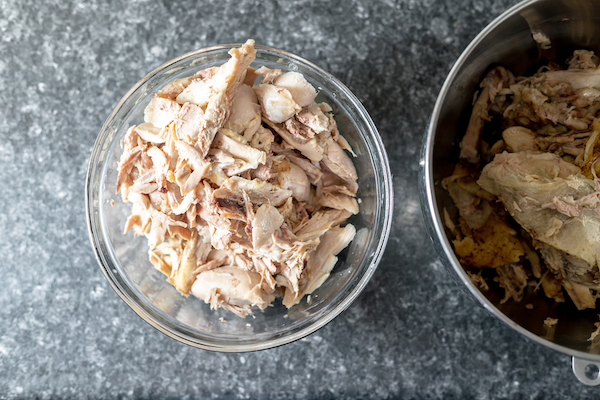
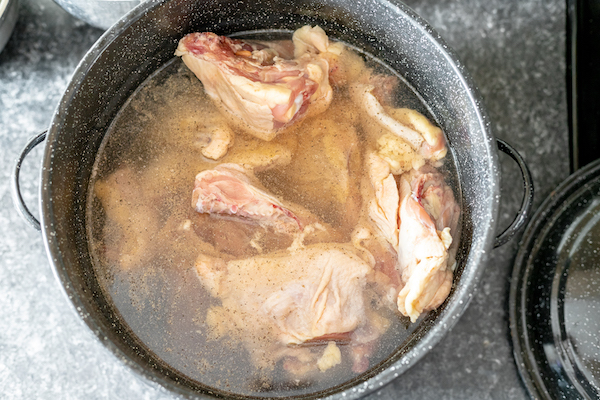
Bake or boil chicken, then let cool until you can handle it without burning your hands.
I usually boil mine in a huge kettle; that way, I can make broth at the same time – it kills two birds with one stone. Then I remove it from the kettle and lay it out on baking trays so it will cool quickly.
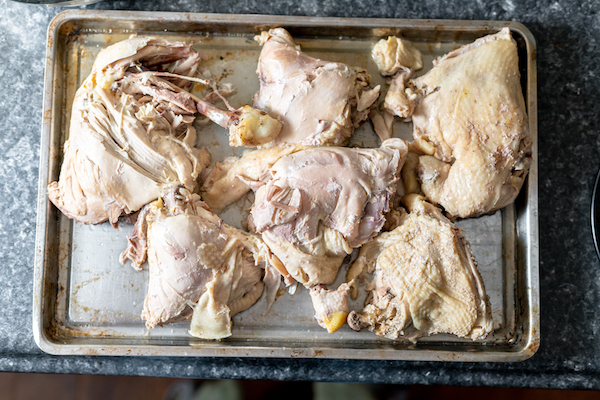
Once it’s cooled enough, I de-skin and de-bone it.
Pack the cooked chicken loosely into jars, top with the same salt, pepper, and broth, and pressure can essentially the same as you did the raw packed chicken.
A Note on Seasoning Canned Chicken
While I’m a huge believer in seasoning, I like to stick with salt and pepper for canning and season according to the recipe we’re making when we open the jars. That keeps us from getting back into a corner without meal choices.
Everybody is different, but the only other seasoning I would consider adding to my canning jars is something like Tony Cachere’s Creole seasoning since I add it to so many things anyway.
How to Can Chicken: Video Tutorial
Below, you’ll find a short video showing and discussing more about canning chicken, and below that, the printable recipe card with the full, zero-fluff instructions.
How to Can Chicken
For any homesteader, canned chicken is a must. Here’s a simple way to make it yourself.
- Prep Time: 30 minutes
- Cook Time: 75 minutes
- Total Time: 1 hour 45 minutes
- Method: Canning
Ingredients
- Chicken
- Salt
- Pepper (optional)
- Water
Tools:
- Canning jars
- Canning lids
- Pressure canner
Instructions
- Prepare pressure canner by filling it with the appropriate amount of water (your canner instructions should say; most 16 quart canners use 2 quarts of water), and fitting with inner rack
Prepare chicken:
- To raw pack separate poultry at joints. Bones and skin may be left in/on or removed
- Fill jars to about 1 inch of headspace top with 1 teaspoon each of salt and pepper (for quarts; halve for pints)(optional), and fill to within 1 inch of headspace with water.
- To hot pack, bake or boil chicken until just done, debone and de-skin
- Loosely pack (i.e. don’t pack the meat down) chicken into jars, to about 1 inch of headspace
- Salt and pepper as with raw chicken
- Top with water or the broth in which the chicken was cooked
- For either method, inspect the rims of each jar, wiping down to remove any debris
- Fit with lids, and screw rings down firmly
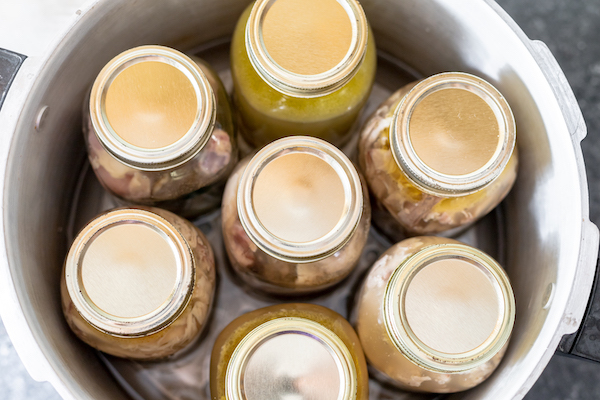
- Place jars in pressure canner, and secure lid
- Heat over medium-high heat
- Vent steam for ten minutes
- Close vent and/or place weight and bring to 10 pounds of pressure
- Process pint jars for 65 minutes, and quarts for 75 minutes
- Turn heat off, and let pressure come down naturally
- Open vent
- Let jars continue cooling, or if you need to use the canner again, open lid and remove jars carefully, protecting from drafts
- Set out of the way and cover with a towel to further protect from drafts while they cool
- After 24 hours, rings may be removed for storage


The content here is excellent. This is a fascinating subject, and I enjoy reading about it. I learned a lot of useful information from this